Make your wing a "Convertible"

I decided to add this page to my website because I do a lot of tinkering with Zagi's and other foam flying wings. Probably the most useful thing I have done is to make my wings "convertible" from glider to electric. The one I used for photos below happens to be an XR Combat Wing.

I have actually done 3 "convertible" jobs on foam wings. One on a Zagi 400X, one on a Zagi 3C and this one below is an all EPP XR Combat Wing (similar to the Zagi 3C but with only 1 spar instead of 3).

NOTE: I would not recommend the (full depth) battery mod if you are just learning to fly because the battery stays in when you bean your beak - meaning the nose will take a hard hit as opposed to the battery just being ejected. IF you want the battery to eject, cut the forward end of the battery cutout at an angle that will help it eject upon impact.
OTHERWISE: Use the stock 400X motor tray depth and cut the front of the tray off. The battery will then just pop out the front saving your beak! Once you are comfortable that you can minimize damage when crashing this mod is a nice way to lower the profile of the larger batteries.


I wanted to have a slope/thermal-soar/combat glider AND also be able to go electric... so I have built a few "convertibles". The idea being in less than 5 minutes you can go from a glider to an electric or vice versa. Just pull two pieces of tape, install the smaller battery and a foam block where the big battery used to be and "Viola!" electric to glider!

Below are some photos to explain some of the mod's I have done to make a 2 (Two!) in one flyer.

Layout and servo installation: One thing I do that makes the installation of the servos RX and battery packs easier is that I cut all the way through the wing when making a cutout, then glue a slice of the piece that I just cut out to make the bottom cap for the cut-out.


I also ran my servos deep and installed the connecting rods internally except for 2.5" before the elevon horn. This makes for a CLEAN top surface and less prone to damage. Since you are going to be burying the servo, I would recommend using servo savers!


I wanted the deepest cutout I could get away with for the battery pack so I made the bottom cap out of some foam core fiberglass sheet that was only about 3/32" thick. This kept the strength of the wing more intact. I routed the bottom to fit the cap and over-lapped the edges by about 1/2"


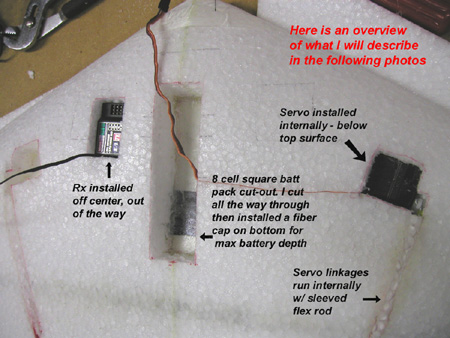
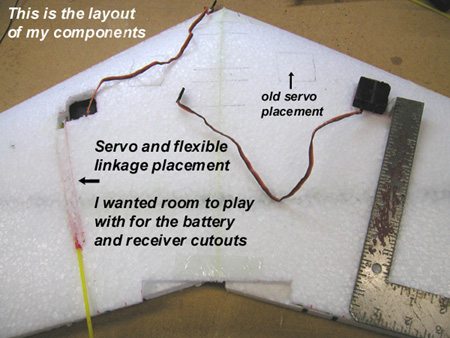
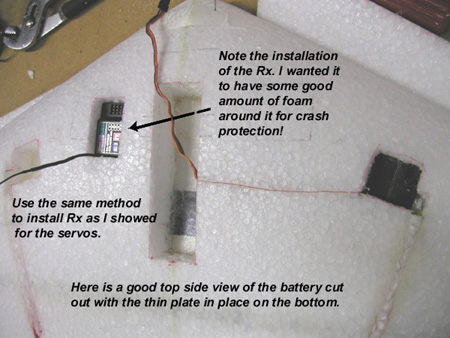
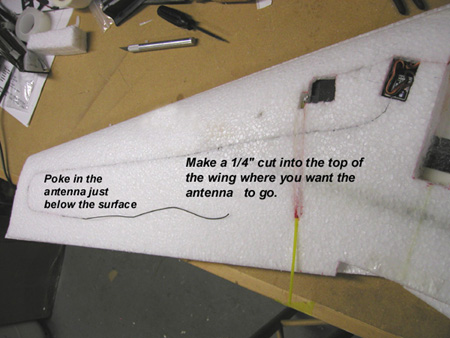
Install all the electronics, wires (including the Rx antenna) and servos for the last time. Hook up the battery and MAKE SURE EVERYTHING WORKS!

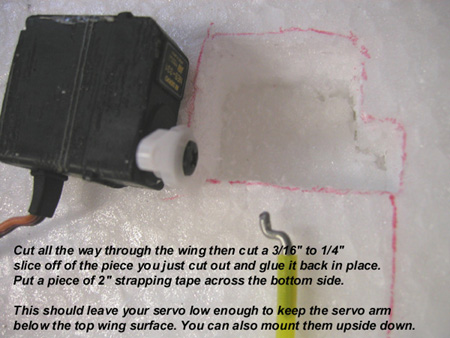
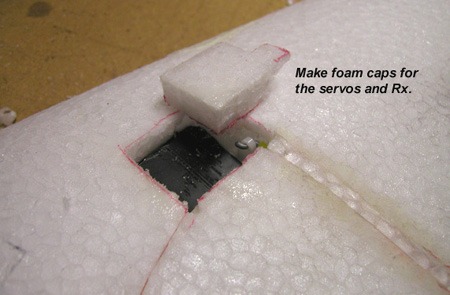
Make foam caps for the Rx and servos, tape them in place with 2" straping tape. With everything installed You are ready to add the final straping tape and cover the wing. Follow the instructions provided with your kit for this step.

NOTE: If you use colored packing tape did you know that it will heat shrink very nicely??!! Use your heat gun and shrink it up nice and tight. Be very careful not to MELT the wing! Keep the heat gun moving at all times. Heat shrinking your wing will make it stronger and it will look a lot better!

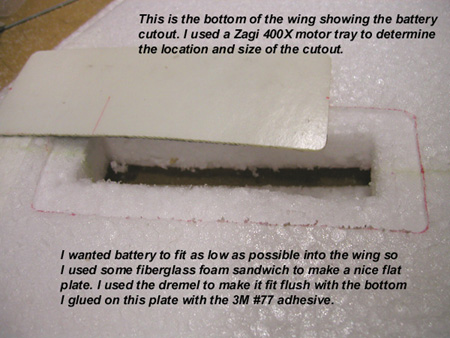
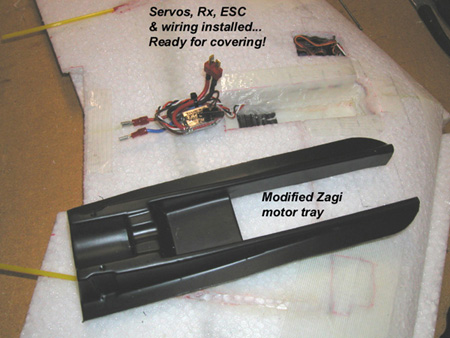
For the motor tray I used the Zagi 400X tray. I cut the bottom out and cut it off at the point where the square battery pack ends on the front. Check out the photos.

NOTE: On the Zagi's and even more so on the XR Combat wings the incidence angle of the motor is too high unless you like the nose to point to the sky when you hit the throttle! I like a little bit of incidence but the stock 400 tray is too much! I place a 1/8" piece of rubber under the front of the motor, then strap it down. This reduces the nose up tendency but you might want to keep some of this tendency in for hands off climbing.

For the canopy use the standard (old style) Zagi 400 part. The old style canopy is a lot lower profile than the 400X canopy. I cut it short by a couple inches, used a heat gun and soldering iron to re-make the nose. This makes it about 2" shorter than the stock one. This is really nice because it will rarely break on a nose in crash. I HATED buying those canopies and motor trays all the time! This will help a BUNCH!

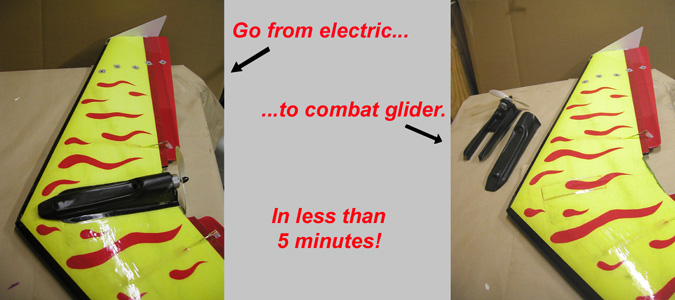
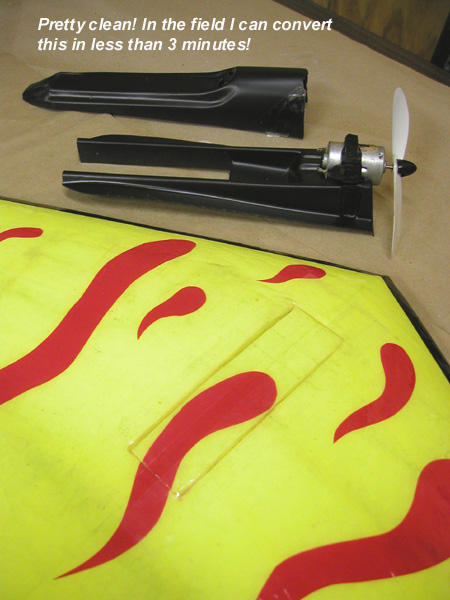
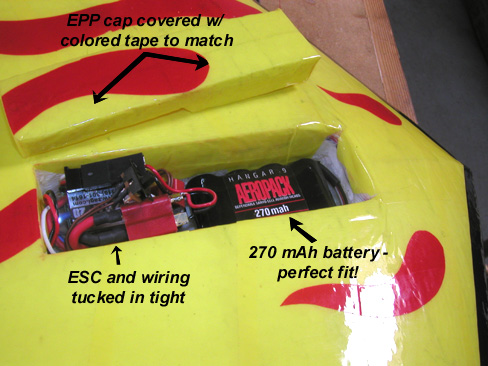
Well, that's about it, tape the motor tray on, install the battery, power up and fly! To convert to the glider, just remove the motor tray and canopy, install the smaller Rx battery (I use a 270 mAh 4 cell flat) cover the battery cutout with a foam cap and tape and go soaring!

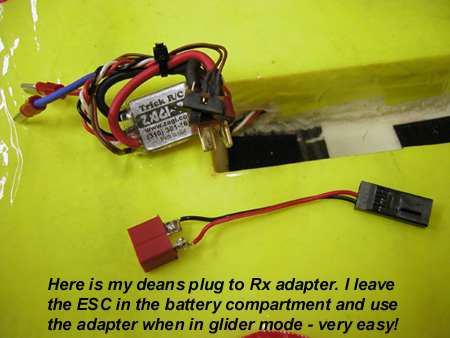
NOTES on the conversion: I chose to leave the ESC (electronic speed control) in the battery cutout compartment. I then made a power cord adapter that went from the ESC deans connector to the battery. This works well because you don't have to unbury any wires each time you convert - very clean this way.

My XR Combat wing "glider" came out at 17.1 oz. but I had to add 1.8 oz. to the nose to get a 7.75" to 8" CG from the nose. so my RTF (ready to fly) weight is 18.9. Usually I have to add ballest on a combat day anyway so this is not too bad. In retrospect I think I should have mounted the servos a bit closer together and further up front - next time!

NOTE on CG change after conversion: My wing came out so that once the CG was correct for the glider version using the smaller 270 MAH 4 cell Rx battery I could then easily get proper CG in electric power mode by moving the big battery forward or aft. Once I found the "sweet spot" I marked it and then swapping back and forth resulted in no change in CG... your result may vary so always check your CG when making changes or mods (like this conversion).

I hope this has been helpful! Have fun in whatever mode you choose!

Here is another really EXCELLENT website with LOTS of tech hints, tips etc. for flying wings check out yourzagi.com

NOW GO FLYIN'!!!


Home