


**NEW UPDATE!... be sure to scroll down the page to see the major pod/boom re-design!
OK, the Orange Un-Crushable (proto #1) went extremely well. Now I will take what I learned from that project and apply it to this one.
OBJECTIVE: A durable high performance thermal/slope and some what all around "full house" ship (aileron, flaps, elevator, rudder) that I am not afraid to launch in the sketchiest of conditions or worst of flying sites. I want something that I can bang around, yet still have a good performance envelope. This will be similar to #1 prototype, but with a higher aspect ratio wing and the added flaps of course.
This is my 2nd EPP proto ship, however I did again use a wing kit this time a little higher aspect ratio wing from a Highlander 2 Meter foamie ship from Mad Aircraft Designs. I modified this wing in a few ways: First I made it two piece and secondly I modified the wingtip area. I also added a full length carbon strip along the spars.
I again wanted to use Coroplast for the tail feathers even though it weighs a little more. The Tail on my #1 plane worked very well, so this one is nearly the same design, only a little better construction and lighter weight.
I am using a similar pod and boom design to minimize weight and ease replacement/modification of the over all length. I found a slightly lighter tapered boom to use this time. My goal is to keep it under 35 oz.
Click on the thumbnails to ENLARGE.
|
I again started on the tail first - here is the beginning of the all carbon fiber frame. | |
Another view of the carbon fiber tail frame. | |
Here is the finished tail on the end of the tapered boom. |
|
This shows the single bolt holding the tail section on. It can be shimmed for positive or negative incidence. | |
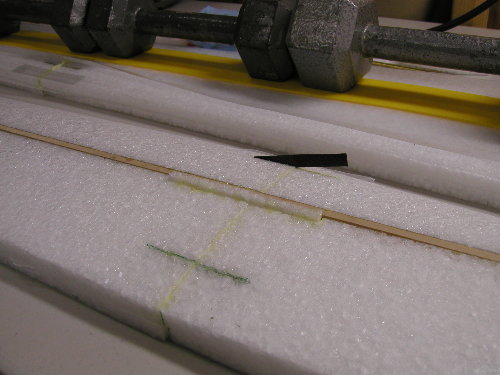
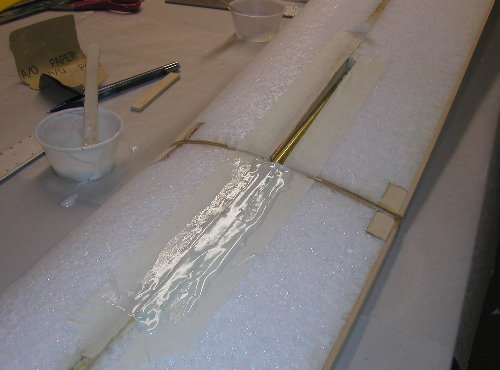
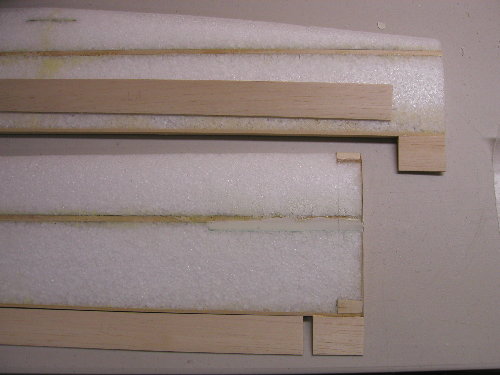
Next, I started the wing. Here are the spars being glued in. I added a full length CF strip on it as well. | |
I added a couple CF strips into the foam at the outer panel joiner area. |
|
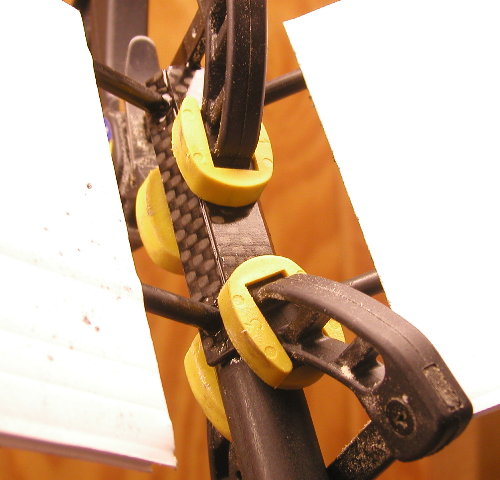
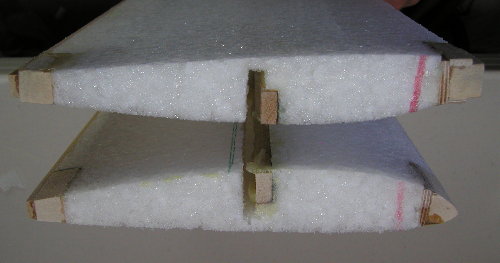
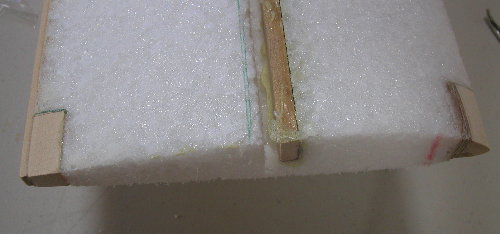
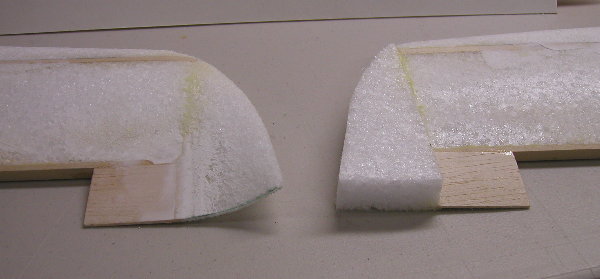
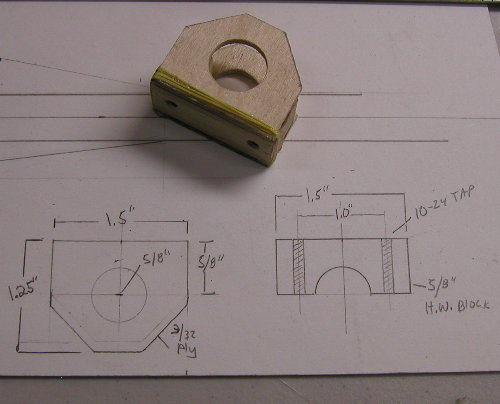
I epoxied hardwood blocks on the root leading and trailing edges. | |
These hardwood blocks will be for the wing through bolt and leading edge mounting pegs. | |
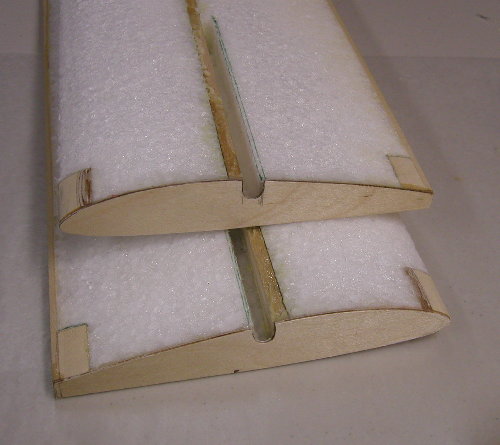
Next I epoxied on some ply wing root ends, note the notch for the wing joiner tube. |
|
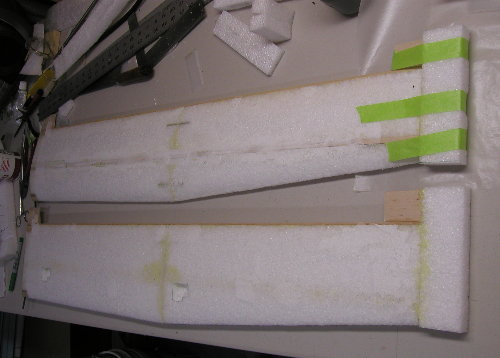
I used 5 min epoxy w/micro-ballons to set the wing joiner tubes. The height of the root end tube notch relative to the cut-out height of the foam gives me the dihedral I want. | |
I then cut the ailerons and flaps to length a epoxied the inner and outer trailing edge sections onto the wing. | |
Note on the outer trailing edge is tilted upward on the outside... this is for some washout. | |
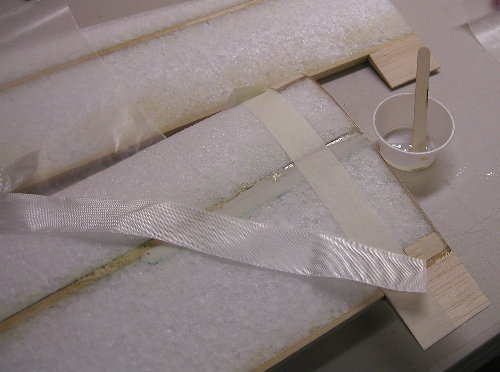
I then set up to glass the inner 1 inch of the wing root. | |
Here is the completed fiberglass job on the wing root. | |
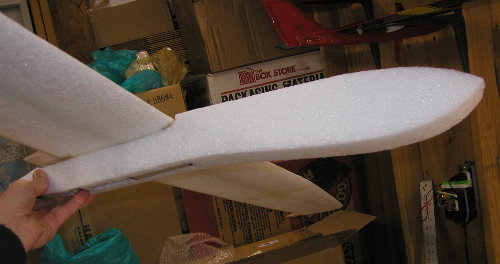
Blocks of EPP foam are then glued to the tips using urethane glue. |
|
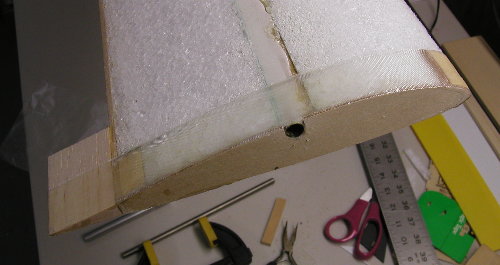
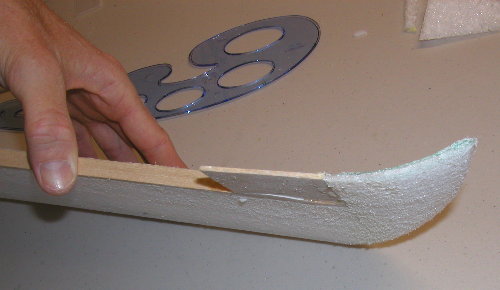
Here is a before and after shot. I used a hotwire and template to get the basic shape - then sanded with 60 grit. | |
A little better view of the finished shape of the tip. The wing is now ready for servos and covering. | |
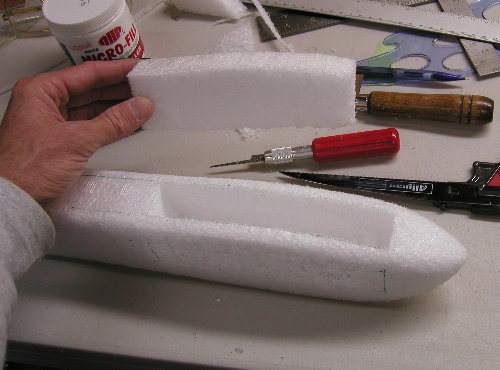
I then started on the nose pod. Here are the templates on the pre-cut block of EPP. Note that I made the cut-out for the boom first. | |
At this point I wanted to see how things were "shaping up" - here is the rough cut nose pod with the wing. | |
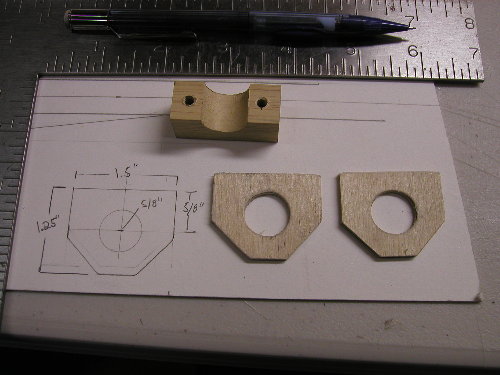
I had to build a "bolt block" for the wing mounting screws to go into, this will slide on to the boom and be embedded into the nose pod. | |
I epoxied the ply ends and block together and wrapped it with kevlar thread. | |
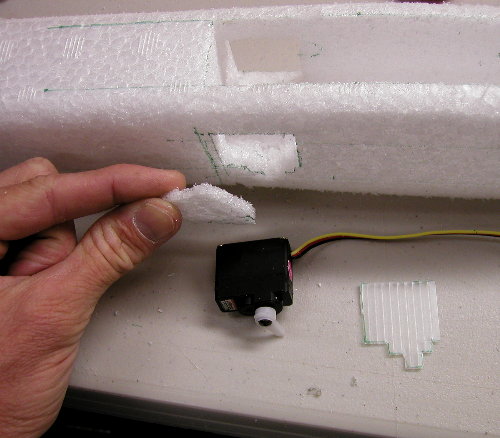
Next was the cut-out for the radio eqt. | |
The easiest way to make the servo beds are to cut the exact shape all the way through, then trim for thickness. | |
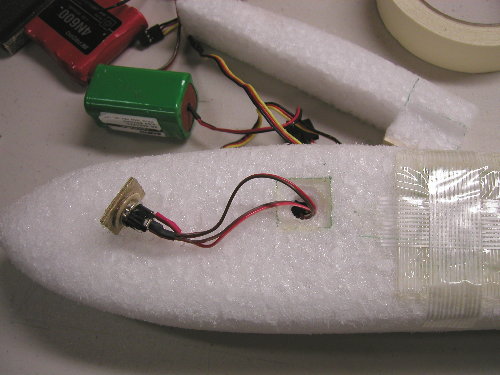
I'm a big fan of switch-jacks, here is the install on a foamie. | |
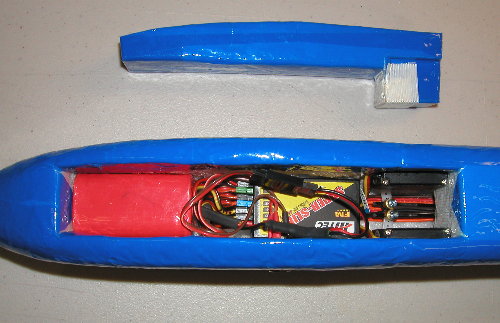
Here I have covered the pod and here is the radio installation. | |
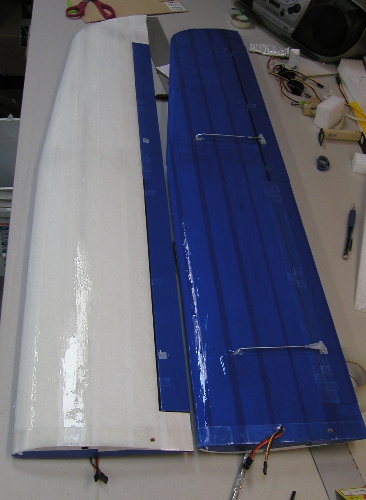
All 4 servos are installed in the wings, then the wings are covered. I used packing tape on this proto. | |
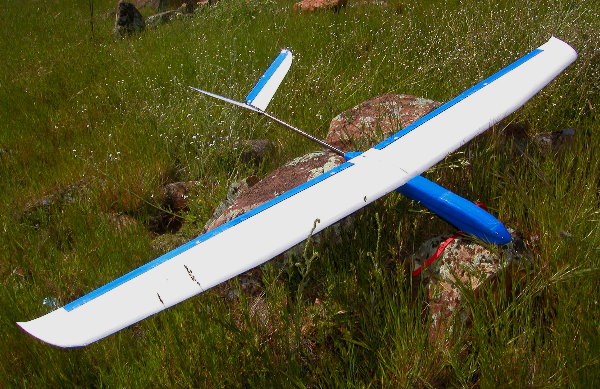
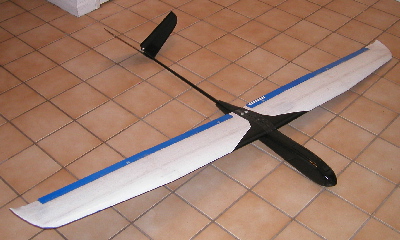
Ta-Da! The finished plane, nice looker I think! | |
Here is one thing I was after... CROW MIXING. This baby will PARACHUTE down to you - SWEET! |
WHAT I'VE LEARNED: Well I tried to save a little weight by making the boom shorter even with the longer wing. It still flys GREAT but I needed to couple a bit of rudder with the ailerons and dial in a lot of differential to get it to track nicely. Once that was done this ship flys great!
It will fly SLOW it will fly fairly FAST and most importantly it BOUNCES! Several cartwheels later the worst damage has been a broken rudder spar tube. Fixed that in 5 minutes.
Once in a turn it is really neutral needing very little input to keep it going where you want. It thermals in light lift and slopes pretty well even without ballest.
WHAT WOULD CHANGE? Well I had an early on mishap on a wing in a dive test (ok I broke it!) so I would beef up the spar on the next one if I wanted to do radical high speed stuff. Also I am not sure this wing is any better than the DAW 1-26 wing from proto #1 as far as flight charactaristics goes, so I will probably go back to that wing. I also have some other booms coming from TailBoom.com that should help reduce the tail weight without sacraficing any strength.
**UPDATE!
Well, as a thermal flyer this plane was great, but as a speed demon it had a few flaws that caused its premature destruction.... I did fly it all summer with these known flaws... then I pushed the limits a bit too much! Here is the story... and lessons learned:
I was flying inverted and basically screwing around and then I did a screaming power dive. At near trminal velocity I pulled up.... nothing... pulled up MORE... still NOTHING. I fumbled for the crow mix switch to slow things down, but too late it plowed into the ground at full speed from about 200 + feet.
I had changed out my original boom for a really light weight (and flexy) DLG boom to try to reduce the tail weight. The push rods were light and flexy as well and the nose pod area flexed a little too. All around too much flex and under great speed it turned out that it would not pull out of the dive - VERY BAD! In retrospect of that flight I should have just tucked it under, gone inverted again and slowed it down then re-gained control. OH WELL!
Actually as far as the structure itself I only broke the boom and a wing spar - both EZ to fix, however more expensively I mashed the battery and Rx too. I could have easily rebuilt it but I opted for an all new pod and boom of better construction and design.
The new design is about as stiff as a glass ship! I also made the ruddervators PULL to bring the nose up instead of pushing so no more chance of of flexing push rods in a dive. I also went with an Allegro boom from tailbooms.com which only weighed about 10 more grams but is super stiff. The final thing I did that made the pod area SUPER STIFF was to insert 5 lengths of flat 1/32 x 1/4" carbon fiber strips throughout the pod/fuse area.
Here are a few photos of the new pod/boom design. This thing flys great! It will slope, thermal, hi-start... and BOUNCE! This plane now goes with me every time I fly!
 |
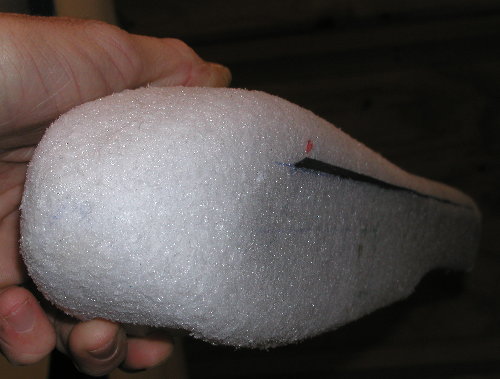
Here is the new core for the Pod - a bit larger in size for added stiffness and more importantly room for the CF strips I will insert later. | 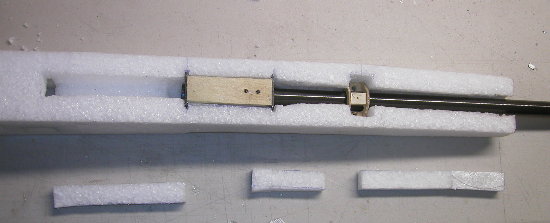 |
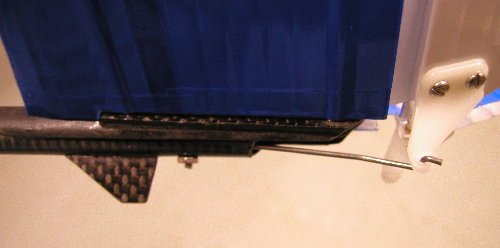
Here is the boom inlayed into the pod slot. | 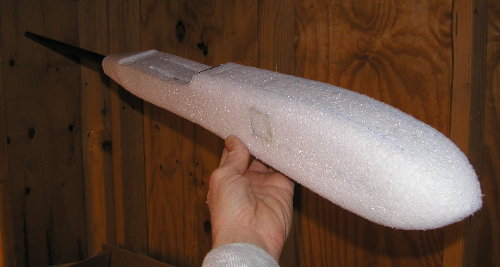 |
Here is the fuse all sanded and shaped - starting to look nice! I inserted the radio eqt the same way as previously. |
 |
So as not to repeat my last boo-boo I inserted 5 full length CF strips along the fuse. This made it STIFF! | 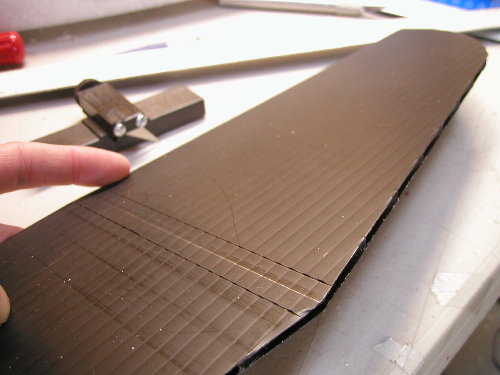 |
I cut out the tail using a single piece of Coroplast. | 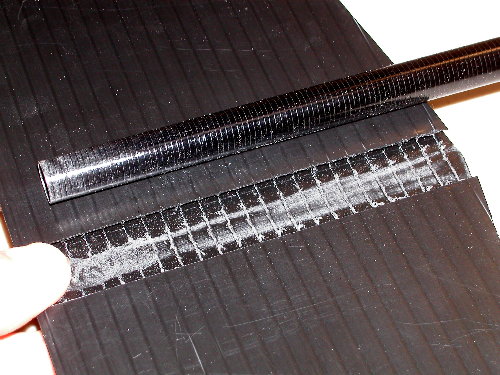 |
Next I routed out a slot for the boom still leaving the tail all one piece (for strength). |
 |
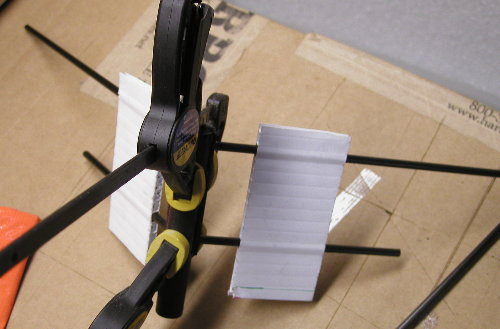
To attach the tail I made a simple "V" bracket out of aluminum. It is attached with double sticky tape and fiber tape. | 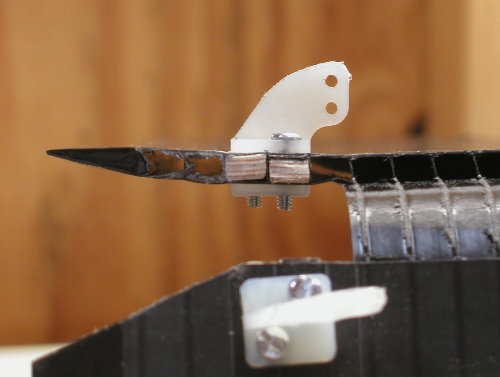 |
I installed the control horns - notice the balsa stiffners I inserted in the Coroplast. | 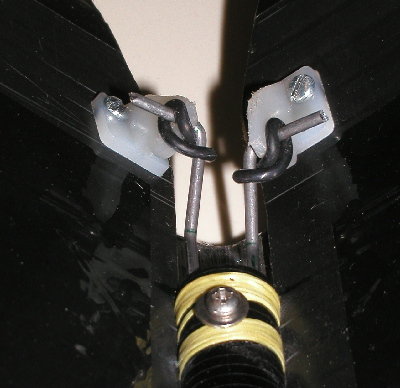 |
Here is the finished control set-up. Noticed I wrapped the boom with kevlar at the bolt hole area. |
Well, that is about it. The plane flyes great and is lots of fun since you can fly with no fear of damaging it! It was a lot of work designing, re-designing etc, but well worth the effort!
Here is the new configuration all finished up.
|
